

Roasting Coffee Beans, Tips To Roast Coffee Beans At Home
Roasting Coffee Beans at home can be an extremely rewarding and delicious hobby. As someone who has been home roasting for over 10 years, I’m excited to share my tips, tricks, and guides to help you start roasting your own coffee and getting the most flavor out of those magical coffee beans.
In this comprehensive guide from vietnamcoffeebeans, you’ll learn everything you need to know about the different roast styles, the step-by-step roasting process, the equipment needed, and troubleshooting common issues. Let’s dive in and start roasting!
Takeaways
- There are various roast styles from light to dark, each giving a different flavor profile. Start with a medium roast to get the full origin character.
- Roasting at home can be done with basic equipment like a frying pan, popcorn popper or oven. Specialty roasters provide more control.
- Listen and look for the first and second cracks during roasting. These indicate key stages of development.
- Control variables like heat, airflow and time to get an even, consistent roast. Take notes to perfect your roast profile.
- Store roasted beans properly to maximize freshness and flavor. Grind beans right before brewing.
Into Coffee Roasting
As a long-time member of the home-coffee roasting community, I’m delighted to share everything I’ve learned over the years about the art and science of roasting coffee at home. There’s nothing quite like the aroma of freshly roasted coffee beans coming right out of your own roaster!
While most people buy pre-ground coffee from the store, roasting your own unroasted green coffee allows you to fully control the flavor profile and freshness. Just like baking bread or brewing beer, coffee beans roasting is deeply satisfying. With a little bit of practice and the right technique, you’ll be able to produce cafe-quality coffee at a fraction of the price.
This guide will walk you through the entire roasting process from start to finish using various home methods. You’ll learn how to:
- Choose the right coffee beans and roast style for your tastes
- Set up a simple home roasting apparatus like a pan or popcorn popper
- Roast caffeine beans to the perfect color and temperature
- Listen for the “cracks” that indicate roast stages
- Master air flow, agitation, and heat variables
- Troubleshoot common roasting problems
- Store and brew your home-roasted coffee
Let’s get into the specifics of roasting coffee at home so you can start enjoying the freshest, most flavorful cups around. When you roast your own, you truly become the master of your coffee domain!
Types of Roasts
When talking about roasting coffee, the roast refers to how long the green coffee beans are heated and to what degree of darkness. From light to dark, there is a wide spectrum of roast styles to explore.

Light Roast
A light roast means the beans were roasted for a shorter period of time at a lower temperature, around 350-400F. The beans will reach the first crack but not much farther. With light roasts like Cinnamon Roast and New England Roast, you can still taste the original characteristics and fruity, floral notes. Acidity is highlighted.
Medium Roast
The most common roast used for specialty coffee is the medium roast. These beans are roasted a bit longer, up to 425F. The original flavors become more balanced, and the flavor is fuller. This is a great roast for getting the quintessential coffee taste without going into really dark territory. City, American, and Breakfast roasts are all medium roasts.
Dark Roast
For a bolder, roasty flavor along with less acidity, a dark roast like Viennese or Italian roast is the way to go. The beans are roasted to just past the second crack, usually between 430-450F. Flavors like chocolate and nutty notes come out, and the color is quite dark. These beans need a hotter temperature and longer roast time.
Full City Roast
Right before reaching the second crack is the full city roast. The beans reach an internal temperature around 435-445F. This strikes a nice balance between medium and dark roast styles. The body is fuller but some acidic brightness still comes through.
French Roast
French roast takes the beans into the very dark territory through extended roasting past the second crack. Temperatures often exceed 460F. The beans will be very dark brown and oily. Much of the distinct origin flavor is muted. The overall flavor is intensely roasty and bitter. French roast is used for espresso blends.
Italian Roast
Similar to a French roast, an Italian roast pushes the coffee to the farthest end of the spectrum. Think jet black beans with an oily sheen. Almost all traces of fruit, floral, and brightness are roasted away. The smoky, bittersweet, intense roast character dominates. This works well for dark espresso if you enjoy that strong, almost charred style.
The Coffee Roasting Process at Home
Now that you know the various roast styles, let’s get into the step-by-step process of actually coffee beans roasting yourself using common household tools and appliances.
While commercial systems use large, industrial roasting machines, there are various DIY methods to achieve delicious home-roasted coffee. The basics you need are a heat source, a container to hold the beans, and a way to agitate them. Beyond that, controlling airflow and temperature will result in a more even, consistent roast.

Here are some of the most popular options for home coffee roasting:
Choosing the Right Coffee Beans
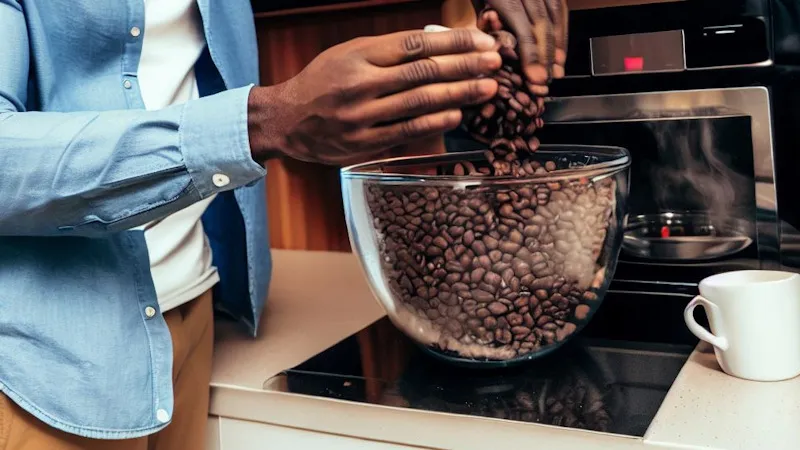
The first step is getting your hands on high-quality green coffee beans. Many specialty roasters sell unroasted beans in smaller batches perfect for home use. Look for single-origin beans from a reputable farm or coop. I recommend starting with beans from Central America, Ethiopia or India as they have nice inherent flavors and are forgiving to roast.
Aim for beans that were harvested recently for maximum freshness. Depending on the roast you’re going for, get beans with tasting notes you find desirable like citrus, flowers, or chocolate. This will set you up for roasting success.
Coffee Beans Roasting in a Pan
One of the easiest methods is roasting beans stovetop in a skillet or pan. All you need is a heavy pan, a heat source, a wooden spoon for stirring, and a mesh strainer.
Preheat your pan over medium heat. Add a small batch of green beans, just enough to cover the bottom in a single layer – about 80 grams or 1/4 cup. Stirring constantly, heat the beans until they start to turn yellowish and smell grassy.
Once the first crack starts between 8-10 minutes, reduce the heat slightly while continuing to stir. Roast until your desired color is reached. Pour the roasted beans into a strainer to stop the roasting process and let them cool completely before storing.
The key to pan roasting is frequent agitation. Stir the beans around every 20-30 seconds to promote even heating. Keep a close eye on them as the roast progresses. Lowering the heat prevents scorching once the first crack begins.
Coffee Beans Roasting in a Popcorn Popper
Another popular option is using a hot-air popcorn popper. The constant airflow circulates the beans for even roasting. Simply add 80-100 grams of green beans to the popper chamber and turn on the heat.
Listen for the first crack around 5 minutes in, then shortly after you’ll hear second crack. Shake the popper periodically to agitate. When the beans reach your desired roast level after 8-12 minutes, pour them into a colander to stop the roasting.
I recommend doing small batches in a popcorn popper to allow proper air circulation. Don’t overload the chamber or the beans won’t roast evenly. This is an easy, affordable way to start roasting at home.
Coffee Beans Roasting in an Oven
You likely already have the most important equipment – an oven. To roast caffeine beans at home in the oven, spread the beans in a thin layer on a sheet pan. I like to line it with parchment for easy cleanup.
Bake at 450F, stirring every 3 minutes. Keep a close watch once the beans start smelling fragrant after about 5-8 minutes. Lower the temp if needed to prevent scorching. Remove from the oven when they reach your ideal roast color.
The oven method requires diligent stirring to roast evenly. You lose some control compared to other devices, but it’s doable with some trial and error.
Coffee Beans Roasting in a Bread Maker
An unconventional tool that works surprisingly well is a bread maker or bread machine. Set it to the dough or bake cycle with the paddle spinning. Add 150-200g of green beans and let the bread maker’s heating element roast the coffee.
Similar to other methods, listen for the cracks. The beans will roast in 10-15 minutes. Watch the color as the machine tumbles and stirs everything for you. Stop early if needed to prevent over-roasting in this enclosed environment.
Dedicated Coffee Roaster
While the above options utilize kitchen tools, investing in an actual coffee roaster designed for home use provides much more control and consistency. Convection and drum roasters are common choices.
Convection roasters use hot air and an agitator arm to circulate the beans. Temperature, fan speed, and time settings allow you to dial in the exact roast profile. Many small shop roasters are convection-based.
Drum roasters slowly rotate a metal drum over a heating element to evenly roast. Similar to commercial machines, drum roasters let you perfectly time the first crack and development based on aroma, color and temperature clues.
Look for small 1-2 lb capacity roasters intended for home use. They start around $200 for entry-level models and go up from there. Using an actual coffee roasting machine takes your home roasting to the next level.
Cooling and Storing Roasted Coffee Beans
Once the beans come out of the roaster, the hot roasting process will continue cooking the beans unless you quickly cool them down. Pour the hot beans into a mesh metal strainer or colander, and stir constantly until they reach room temperature.
Transfer the roasted coffee beans to an airtight container like a mason jar or bag with a valve. Press out excess air before sealing. Store in a cool, dark place and consume within 1-2 weeks for maximum freshness.
The beans will degassed for the first 24 hours after roasting. Wait at least one day after roasting before grinding and brewing for the best flavor. Now sit back and enjoy the fruits of your home-roasting labor!
Tips for Roasting Coffee Beans
Succeeding at home coffee roasting takes patience and practice. Follow these pro tips for getting the most out of your roast:
Start with a small batch
When first learning how to home roast, start with smaller batches of beans – around 100 grams or 1/4 lb. This allows you to easily monitor the roast and make changes as needed. Once you perfect your roast profile, you can scale up.
Use fresh green coffee beans
High quality, fresh crops are key. Look for beans roasted within the past 6 months or ideally the new season’s harvest. Old or stale unroasted beans won’t yield the best tasting coffee so invest in the good stuff.
Roast caffeine beans evenly
Frequent stirring, shaking or agitating the beans promotes even heating and color development. You want each bean roasted consistently without burnt or underdeveloped patches.
Don’t overcrowd the roasting chamber
If roasting in a confined space like a popcorn popper, bread maker or small oven, be sure not to overload the beans. Leaving room allows proper air circulation for even roasting.
Pay attention to bean color
Visually monitoring the color of the beans from green to yellow, tan and eventually brown tells you how far along in the roast you are. Different roasts correspond to different colors.
Let beans cool before grinding
Roasted beans need time to degas and settle before grinding. Let them cool completely before storing in an airtight container. Wait to grind right before brewing for maximum freshness.
Troubleshooting Common Home Roasting Problems
Any home roaster will inevitably run into some issues, especially when starting out. Here are some common problems and how to fix them:
My coffee beans are too light
If your roast is underdeveloped and the color seems too light, the beans likely didn’t get hot enough. Try increasing the heat source, extending roast time and making sure to preheat any equipment first.
My coffee beans are too dark
It’s easy to scorch beans when home roasting. If your batch came out too dark, lower the temperature earlier next time. For drum or hot air roasters, decrease the heat setting.
My coffee beans are burnt
Closely monitor the beans to avoid scorching them, especially towards the end of the roast. Lower heat immediately at first crack to let them develop slower. Stop the roast sooner next time.
My coffee beans are unevenly roasted
Frequent stirring and agitation is key for an even roast. If some beans are roasted well and others underdeveloped, improve your stirring method and use a smaller batch size.
Frequently Asked Questions
Conclusion
I hope this complete guide gives you the knowledge and inspiration to begin your own home coffee roasting journey. With some basic equipment, quality beans, and a little practice, you’ll be crafting delicious specialty coffee in no time.
Remember to listen for the cracks, control your heat source, use a thermometer once you get more advanced, and take good notes! It truly is rewarding to sip on a cup of coffee roasted by your own hands.
The possibilities are endless when you make small batches and can experiment with different beans and roast profiles. Mastering the art of home coffee roasting will bring you a profound appreciation for the complex world of coffee flavor. Your tastebuds will thank you!

How to Make Arabic Coffee At Home with Cardamom & Milk
Unveiling the secrets behind How To Make Arabic Coffee, this guide unlocks the door to Saudi Arabia’s cherished hospitality ritual. Journey beyond…

Buy Arabica Coffee Beans Online India
Arabica coffee beans are growing in popularity across India for their delicious flavor profiles and high-quality taste. Buying arabica coffee beans online…

15 Top Arabica Coffee Producing Countries, Top 5 Coffee Exporters Countries
Top Arabica Coffee producing countries, with Brazil as the top producer and exporter, significantly impacting the world’s Robusta and Arabica coffee output….

Green Coffee Beans Price, Per kg, 5 kg, 15kg Or Whole Bags 2024
Green coffee beans price depends on various factors. Arabica beans, known for their premium quality and flavor profile, generally command a higher…

Arabica Coffee Los Angeles, Order Online & Price 2024
Arabica coffee Los Angeles is booming currently with cafes like Blue Bottle and Intelligentsia focusing on quality beans and preparation. The coffee…

Arabica Coffee NYC: Best Locations for Coffee Fans
Arabica Coffee NYC with a rich tapestry of flavors and practices for coffee fans. The diverse origins of Arabica beans offer a…